I want to build an emergency fund
Figure out how much you need, set it up, and track your coverage month by month.
Step 1: What is an emergency fund?
An emergency fund is cash you can access within days — not investments, not locked deposits. It's there for the unexpected: a car repair, a medical bill, a sudden job loss. Without one, those surprises go on a credit card or force you to sell investments at the wrong time. The goal is to have enough to cover your essential expenses for 3 to 6 months, so you can handle a crisis without going into debt.
Step 2: Figure out your essentials
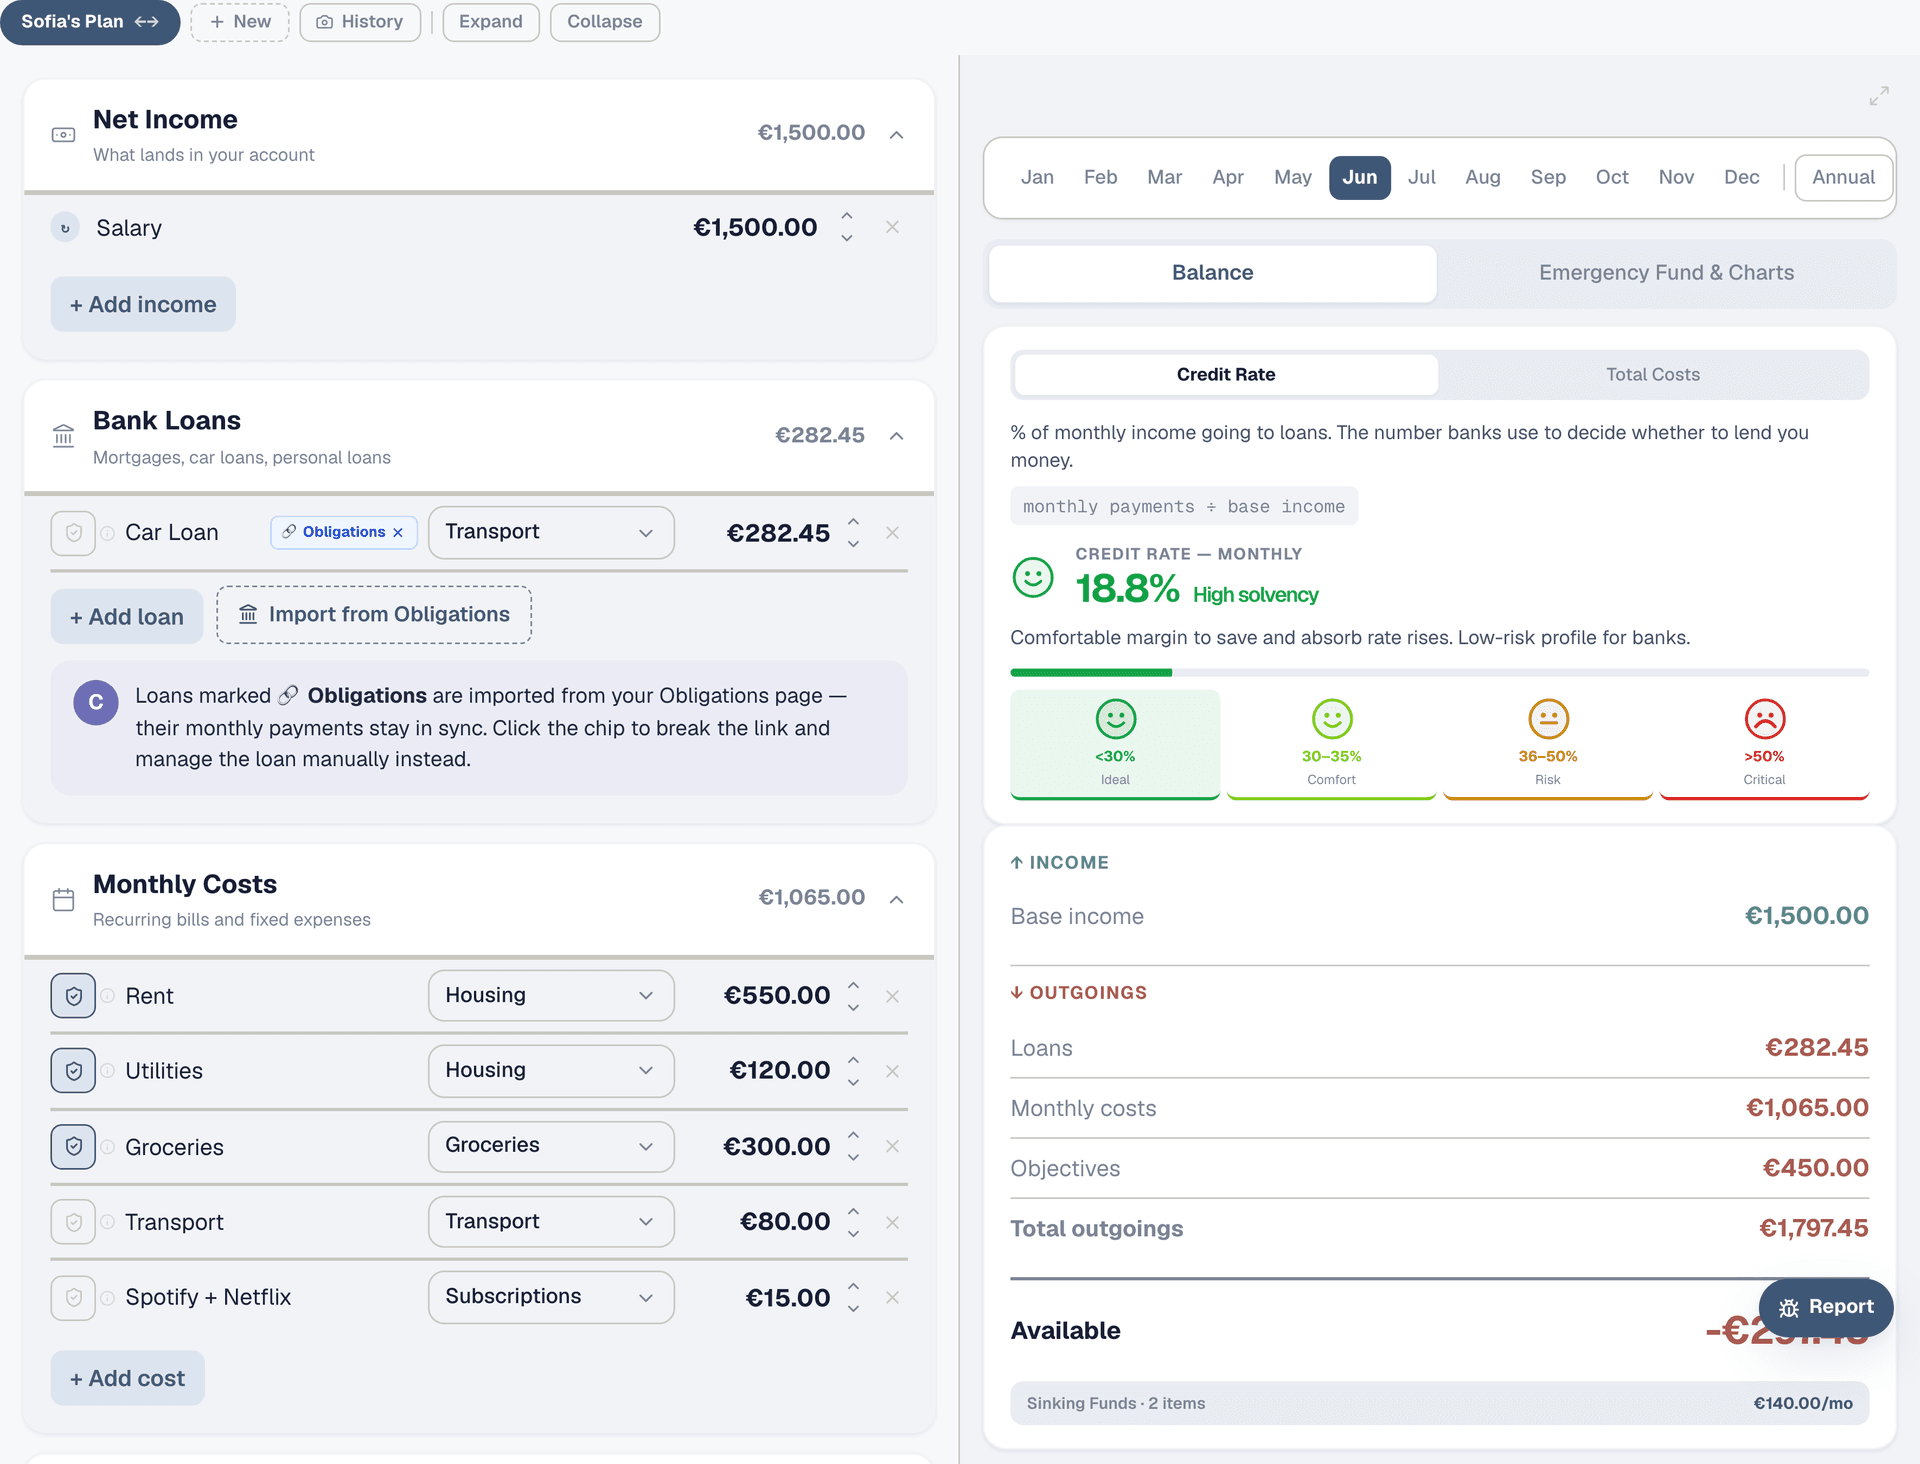
Open the Planner. Look at the right panel — your outgoings are itemised: loans, monthly costs, sinking funds. Not all of these are "essential" in a crisis. Rent, utilities, groceries, loan payments — those can't stop. Subscriptions, vacation savings, eating out — those can be paused. Add up the costs you absolutely cannot cut. That's your monthly essential baseline. For Sofia, that's roughly €1,500 (rent €550, utilities €120, groceries €300, transport €80, car loan €282, basics €168).
Step 3: Set your target
Multiply your monthly essentials by 3, 4, 5, or 6 depending on your situation. Stable job with a partner who also works? 3 months is probably enough. Self-employed, single income, or in a volatile industry? Aim for 6. For Sofia at €1,500/month essentials, that's €4,500 (3 months) to €9,000 (6 months). Pick a number and commit to it — you can always raise it later.
Step 4: Add your savings to Portfolio
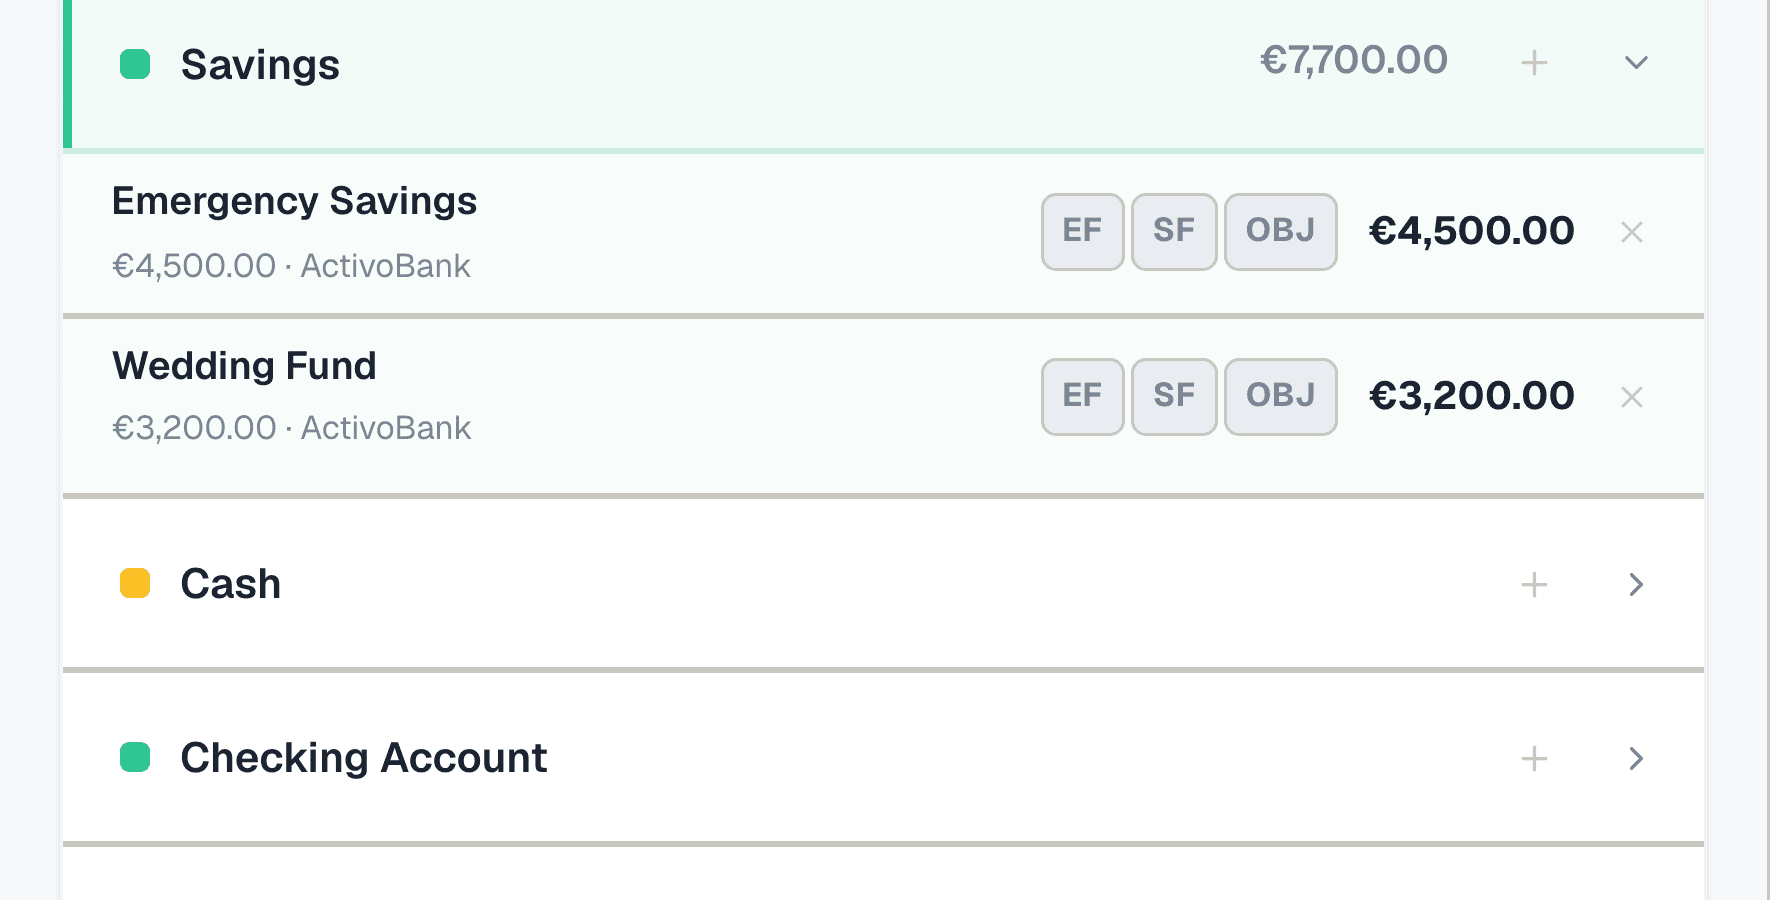
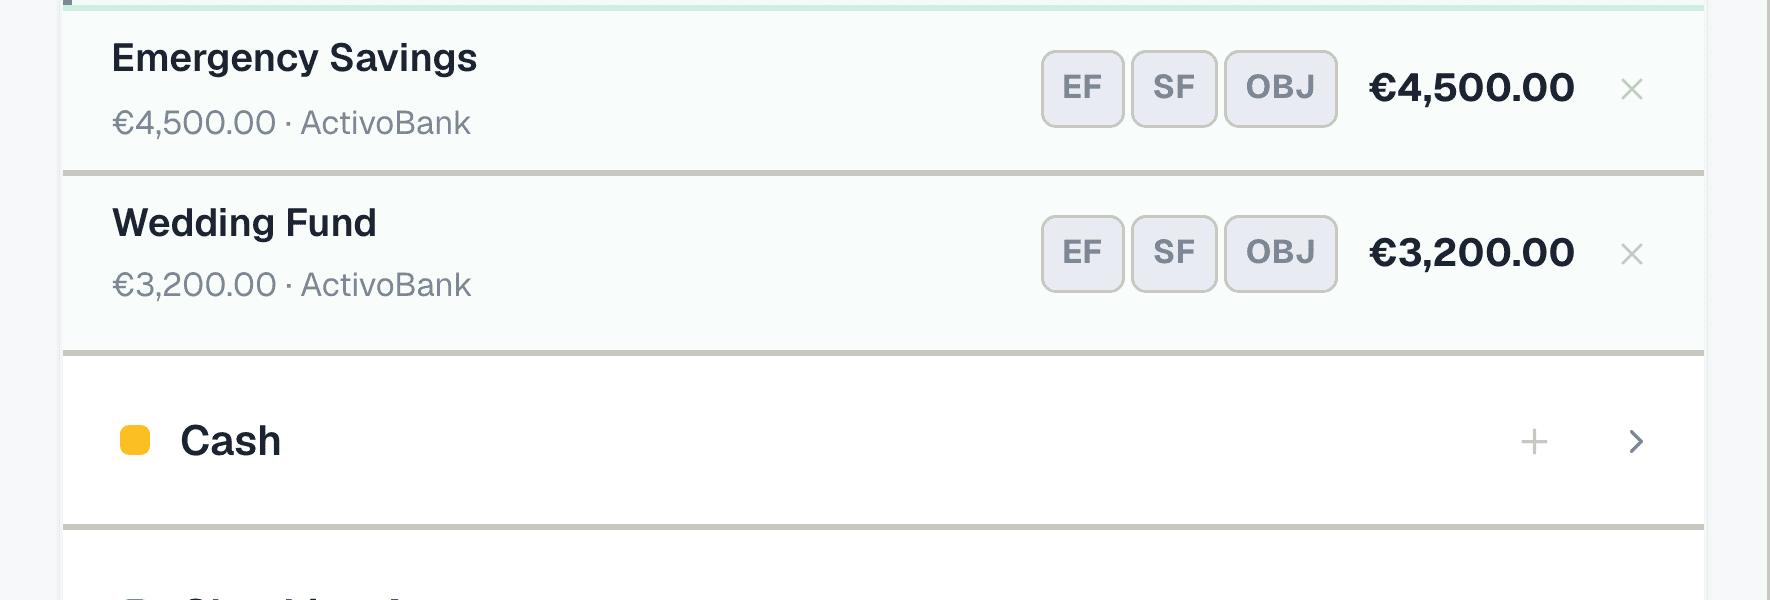
Go to Portfolio and find the Savings category. Click "+" to add a new position. Name it clearly — "Emergency Savings" — set the asset class to Savings, enter your bank name, and put the current balance (e.g. 1 × €4,500). This is the account where your emergency fund lives. If it's split across two accounts, add both.
Step 5: Tag it as Emergency Fund
On the position row, you'll see three buttons: EF, SF, and OBJ. Tap the EF button — it highlights in amber. This tells Collie to count this position toward your emergency fund. The Dashboard uses EF-tagged positions to calculate your coverage automatically.
Step 6: Check your coverage
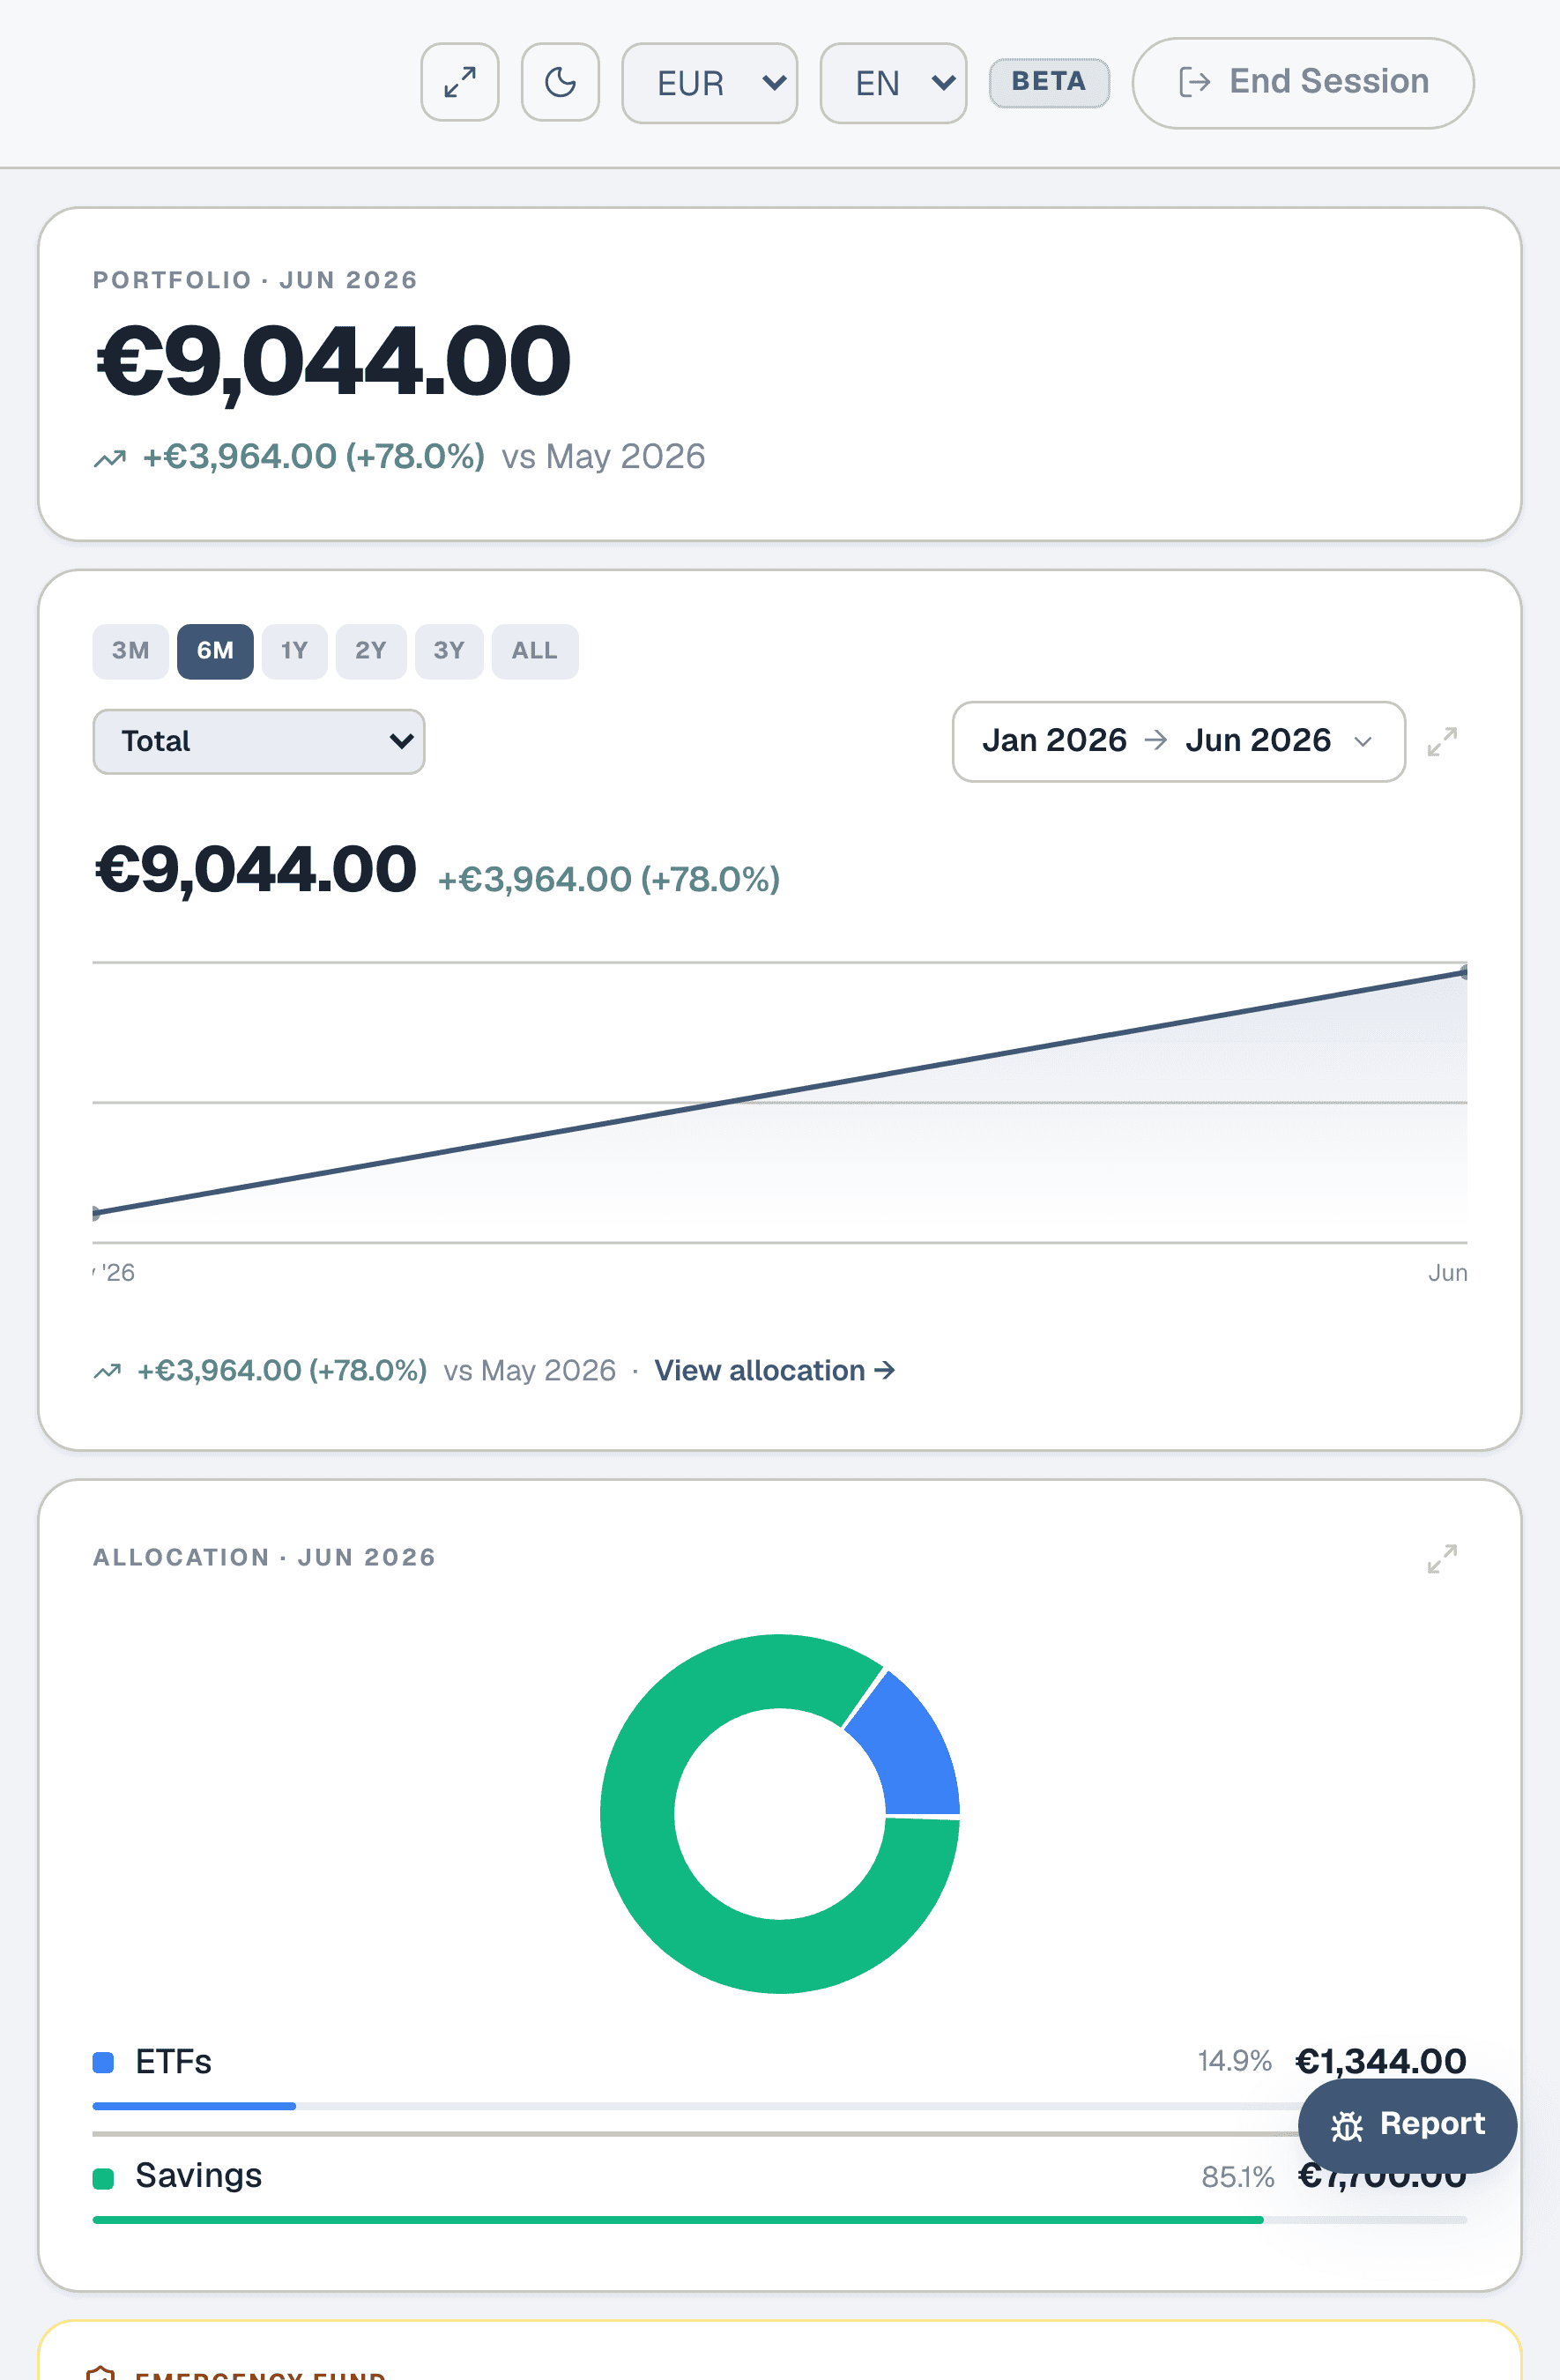
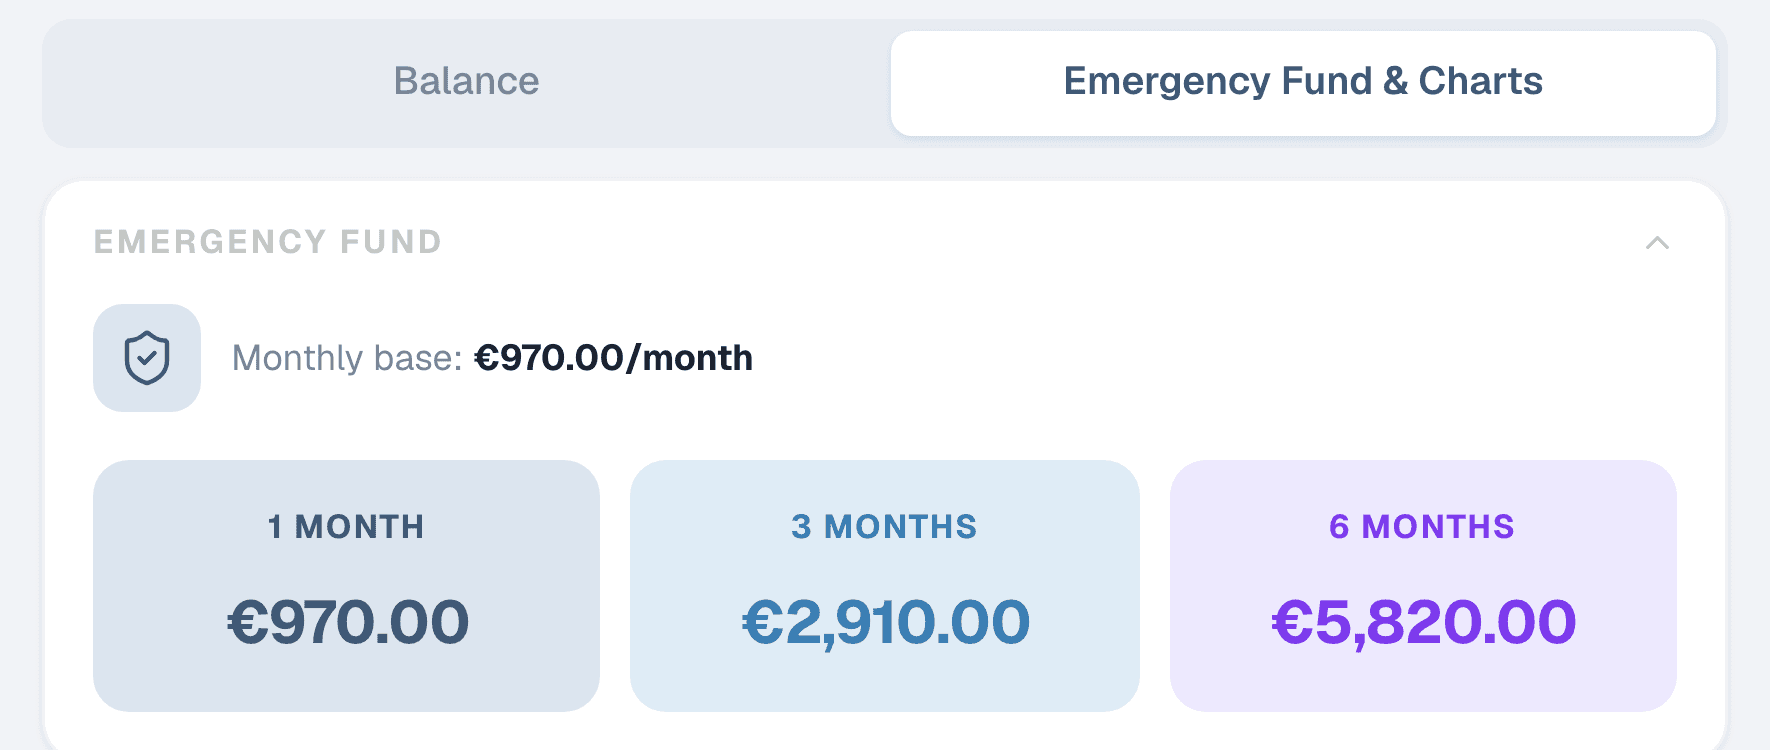
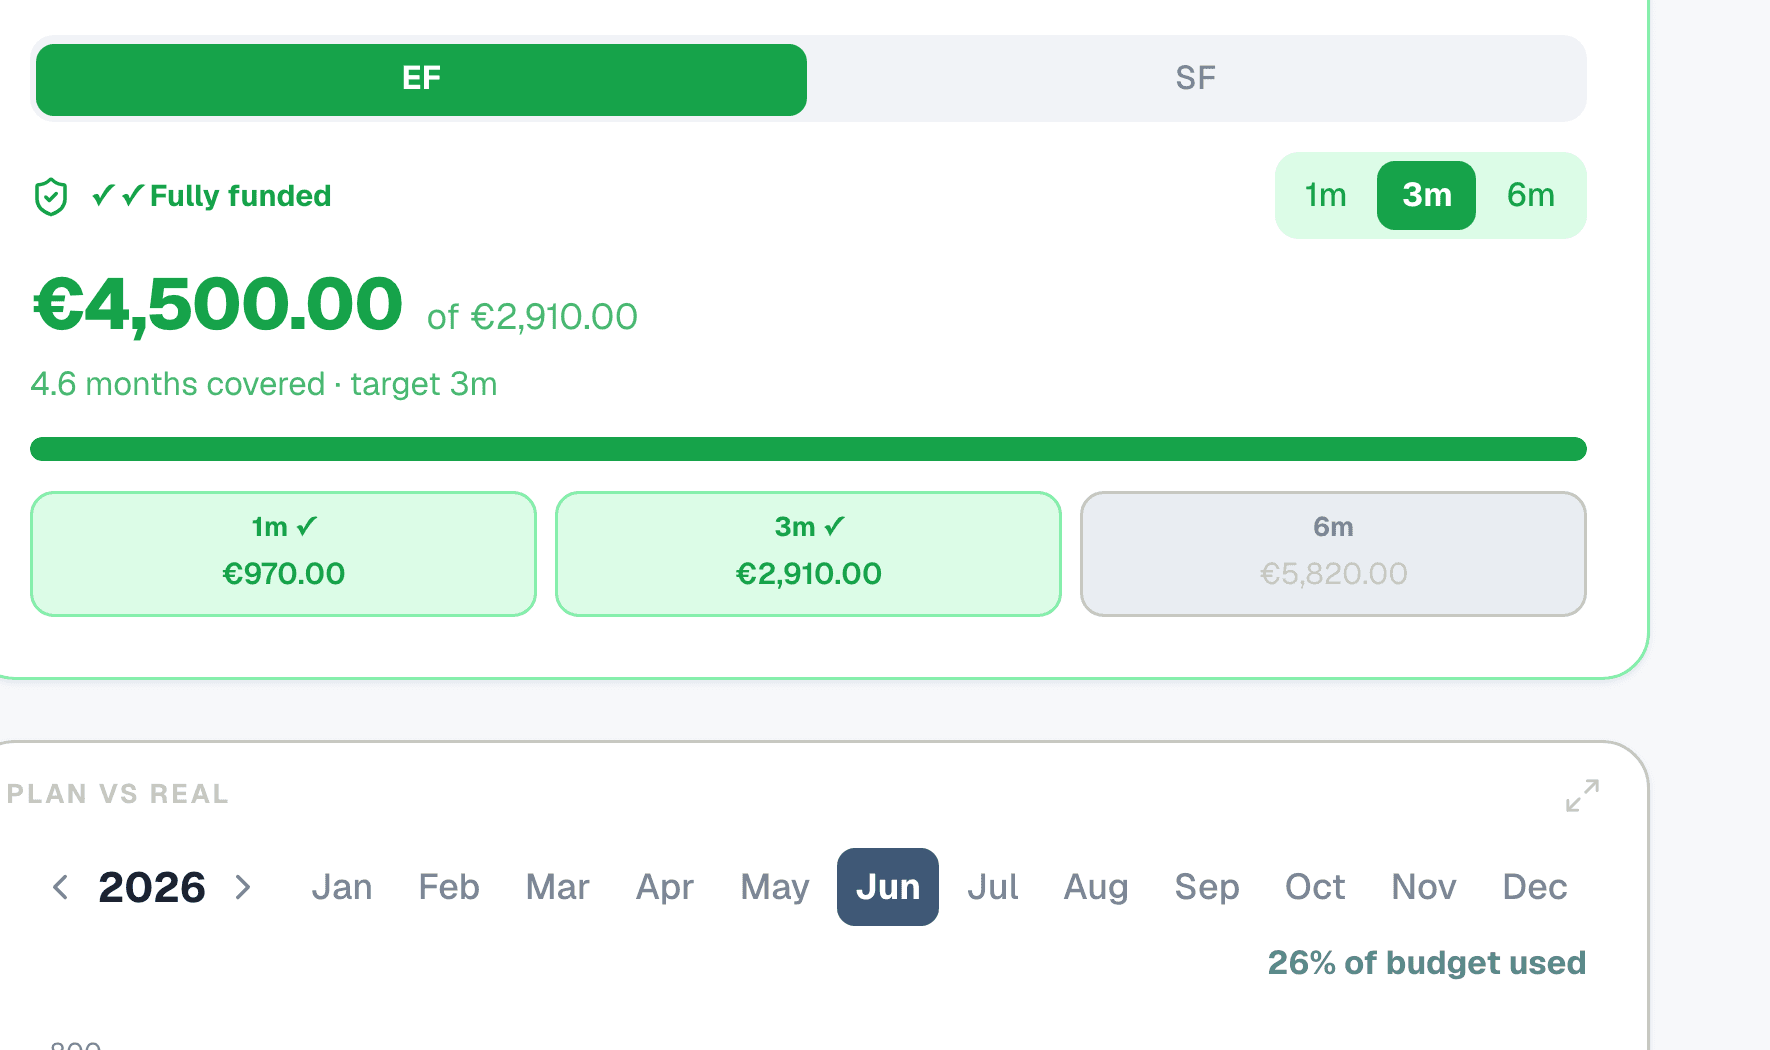
Go to the Dashboard and switch to Advanced mode. The Emergency Fund card shows your current coverage in months — calculated as your total EF-tagged positions divided by your monthly essential expenses from the Planner. Use the target selector (1, 3, or 6 months) to set your goal. The progress bar shows how far you are — green means fully funded at that level.
Step 7: Grow it month by month
Each month, update your savings position in Portfolio with the new balance. Your EF coverage on the Dashboard updates automatically. Once you hit your target, the card shows a "Fully funded" badge. At that point, you can redirect the money you were saving into investments or objectives — the emergency fund's job is to exist, not to grow forever.